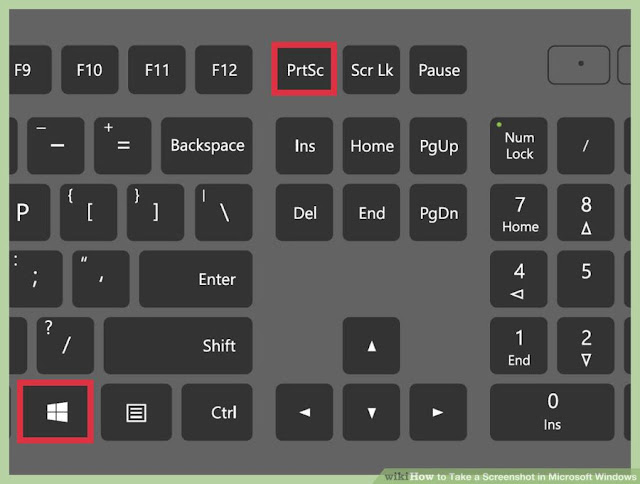
Its only For Wind. 10
- You may need to hold Fn on laptop computers to use the PrtScn button.[1]
- You can access your screenshot by going to File Explorer → Pictures → Screenshot
- Its For All Version Of Windows
2
Type "snipping tool" and press .↵ Enter.
3
Click the ▼ button next to "New."
4 Click the type of snip you want to create. The options provided allow you to capture different types of screenshots:
- "Free-form Snip" lets you draw any shape with your mouse. The area inside the shape will be turned into a screenshot.
- "Rectangular Snip" lets you select a rectangular area to be turned into a screenshot.
- "Window Snip" lets you choose a window to capture.
- "Full-screen Snip" captures the whole screen, with all open windows except the Snipping Tool window.
5.. Drag your mouse to indicate the shape of your screenshot or click a program's window (if applicable). As soon as you select the type of snip you want to create, you can define the shape or window.
- If you selected "Full-screen Snip," the screenshot will be taken immediately.
6 Review your snip. The snip you created will appear in a new window.
For Windows 7 and Earlier
1 Press .PrtScn. You won't see any indication that a screenshot was taken. The screenshot will be copied to your clipboard.
- If you're using a laptop, you may have to hold Fn to use the Print Screen button.
- If you don't have a Print Screen button, see the Snipping Tool section below.
- 2Click the Start button.
3 Type "paint" and press .↵ Enter.
4 Press .Ctrl+V to paste the copied screenshot.
To save your screenshot, click File → Save As in the top-left corner of your screen, and enter a name and location for your screenshot to be saved with.
☻☻☻☻
THANKYOU


Comments
Post a Comment